

How to repair venetian and roller blinds mechanisms
Blinds endure a lot of daily use, from being opened and closed twice a day, to being adjusted throughout the day as the sun moves across the sky. Add to that pet damage, damage caused by children and just general misuse or overuse then it is no wonder that a window blind may occasionally need some maintenance. So, this article will cover some of the common fixes for Venetian and roller blinds, as well as additional advice for vertical blinds too:
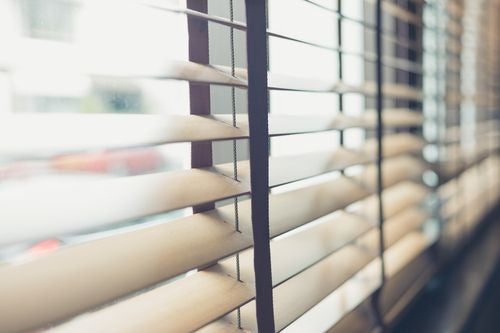
Quick fix repair solutions for Venetian Blinds
- Blind slats will not lower
- Blind slats will not lift
- Blind slats will not tilt
- How to fix an unevenly hung venetian blind
- Fixing a venetian blind that does not open and close smoothly
- Replacing slats on a venetian blind
- How to restring a venetian blind
- How to remove unneeded blind slats
- Replacing a tilting mechanism
- Replacing a tilting wand
Quick fix repair solutions for Roller Blinds
- Roller blinds open too fast and then don't remain open
- Roller blinds open too slowly
- Roller blinds doesn't roll open evenly
Quick fix repair solutions for Vertical Blinds
- Blinds panels are our of alignment
- Reattaching vertical blind panels
- The control chain is difficult to operate
Quick fix repair solutions for venetian blinds
The first thing to keep in mind, is that accidents happen and that venetian blinds can usually be fixed with some simple techniques, or replacement parts. So if you find your blind won't open, or your slats won't tilt then stay calm, and keep reading.
Blind slats will not lower
Nothing is more frustrating than being figuratively blinded by the sun and when you come to block out the light, you find your blind won't lower. Your first instinct might be to yank the cord and force the blind down, but this can just cause further damage. Instead, take hold of the lift cord and bring level with the headrail, then pull gently. If this doesn't release the cord lock, then you will have to take the blind out of the window frame. Once you've done this, find the cord lock mechanism which will be located within the headrail. You should see a locking pin. Take a flat head screwdriver and push the pin to disengage the locking mechanism. By doing this the slats should lower.Blind slats will not lift
Whenever a blind is left fully open for any extended period of time, they can lock into position. In this situation all you need to do is reset the spring mechanism. So gently pull down on the bottomrail of the blind to reactivate the spring. The spring will move back into position, and then when you pull the cord again the blinds should lift.Blind slats will not tilt
On occasion the tilting rod (or wand) can become dislodged from the tilt mechanism - this can sometimes happening during delivery, or during installation of the blind. When this happens rotating the tilting rod will have no impact on the position of the blind slats. However, this can easily be fixed. First remove the blind from the window.
Looking inside the headrail you should see a metal rod running the length of the headrail, as well as the tilting mechanism. Gently manoeuvre the tilt rod back into the position where the mechanism is located. This should fix the problem, and allow you to control slat position with the tilting rod. So replace the blind in the window and adjust the slats into the required position.
How to fix an unevenly hung venetian blind
A venetian blind can often become uneven, as pulling both lifting cords at a slight angle can mean one side of the blind is slightly higher than the other. Repeat this process multiple times and soon there is a noticeable difference between the left and right side of the blind. To fix the issue just raise the blind so that it is completely open, by doing this you will ensure both sides of the blind are in the fully open position. Open the blind fully, and repeat this process two or three times. You should then find that the blind is level again and hangs evenly.Fixing a venetian blind that does not open and close smoothly
A blind that won't open smoothly may have too many friction clips within the headrail. These usually provide tension so that the blind doesn't open or close fully with one pull of the cord. However, if these are too tight or there are too many then the blind can be difficult to open. So remove the blind from the window and look inside the headrail. Locate the friction clips and remove one, or more of these as required. By doing this the tension should be reduced and the blind should open more smoothly.Replacing slats on a venetian blind
It is easy enough to replace a damaged slat on a venetian blind, however you can't just remove one slat. Instead you have to remove all of the slats below the damaged slat, in order to access and replace the one slat you want to remove. This can be frustrating but if done right then you ensure your blind is fully restored and looks as good as new.

So, to begin with remove the cord cap (an end cap at the bottom of all cords, which are designed to avoid unsightly knots). This will expose the ends of the cords, and will allow you to cut the cord just above the knot. You will then be able to unthread the cord through as many blind slats as required until you get to the damaged slat, which you need to replace. At this point you will be able to slide out the damaged slat, and replace it with a brand new slat. Just keep in mind that any holes within the slat has to align with the same holes in the existing slat above. Then all you have to do is weave the cord back through all of the slats beneath the new slat, all the way down to the bottom of the blind, and through the bottom rail. At this stage, tie the cords into knots again and replace the cord caps to give a neat finish.
How to restring a venetian blind
If the cord of your blind snaps or is frayed, then you may think you'll need to replace the blind completely. However, this just isn't the case. Blind cord is relatively inexpensive, and with a little patience you can easily restore your blind to full working order. This is much more affordable than replacing the whole blind. Before dismantling the old blind and removing the broken cord, you will need to measure how much cord you will need to buy.
As a general rule you should measure the full height of the blinds when closed, add the full width measurement of the blind, and add the length of the hanging cord. Once you have this measurement multiply it by the number of cords on the blind (usually two). However, blind cord is relatively inexpensive, so it won't hurt to order extra. Most blind cords start at the tassel, work their way up the side of the blind and go through a tension catch. From there they go through the hollow headrail and down through the holes in the slats. Tracing this journey by eye, you should be able to see that replacing the cord is just a matter of making sure the new cord follows the same journey, going through each mechanism and slat hole.
If you think you may lose track of the way in which the cord goes through the blind then it's always a good idea to take photographs of the cords position before you remove the old cord. Alternatively, you can look at a working set of blinds (should you have them) and copy the way in which the cord goes through that blind. Next comes the fiddly bit. Remove the blind from the window (if you haven't done so already). Disconnect the old string and start to thread the new string through the base of the blind then through all of the slat holes.
It is always best to just follow the path of the old string around the vanes. This means you haven't got to remember the right path of the cord, and can just follow the lead of the existing cord. Similarly if the old blind is intact you could tape the new cord to the bottom of the old cord. By doing this when you pull the old cord out, you will automatically be pulling the new cord into replace it. Just remember to keep the joining point as unobtrusive as possible, as otherwise it may not fit through all of the holes on its journey.

Once the new cord is in place you will need to make a knot at the bottom of the blind, under the bottom rail. This will secure the cord in place and ensure the slats don't come loose. The blind should already have small caps that go over these knots, as otherwise they can look unsightly. Then you should hang the blind back in the window and put it in the closed position, by doing this you will know how much blind cord you need when the blind is closed, and what amount of excess needs to be cut off. Once you are happy with how much cord to cut off, place the cord handle above where you want to cut. Then tie a knot in the cord and trim below this. The cord handle should then slot over the knot neatly.
How to remove unneeded blind slats
It is fairly easy to shorten a venetian blind, as the unneeded blind slats can be conveniently removed from the bottom of the blind. If you have a made to measure mind then you shouldn't need to make adjustments, however you may need to shorten a blind if you have re-purposed an old blind from a different window or have bought a ready made blind. Firstly, close the blind fully so that the blind is fully extended. This should make the blind overlap the bottom window sill. You will then be able to see how many slats need to be removed.
Take a look on the underside of the bottom rail and you should find two or three round plastic plugs. Remove these to access the blind cord, and then you will be able to pull the cord slightly and cut the knot. This will allow you to unthread the blind cord up through the bottom rail and the unneeded blind slats. Unthread the cord through all of the blind slats you want to remove. Once you have achieved this with all unwanted blind slats, you will be able to slide each slat out of ladder-like cord, which supports each slat.
If done correctly you should be left with the required amount of blind slats, which fit neatly into the window frame, and then below you will have trailing blind cord, and trailing ladder-like cord (these will appear either side of the blind, and possibly in the middle too). From here you can slot the bottom rail in the first empty slot of the string ladder, directly below the lowest blind slat. If you are happy with the adjustments and the blind fits snuggly within the window frame, then you can start tying knots in the cord, and triming excess cord as well as the string ladder.
If not then you can add slats back in, or remove additional slats as required. Once you're sure the blind has been adjust correctly, thread the blind cord through the holes in the bottom rail and tie into knots once through. You can then trim the excess and replace the plastic caps to the underside of the bottom rail. This will finish of the blind nicely, concealing the knots and frayed ends of the cord. You can then also trim the string ladder, removing excess string. The ladder can either stop at the bottom slat, or if you prefer it can cover the bottom rail too. The bottom rail isn't supported with the string ladder, and it may look neater to trim the ladder just below the lowest slat. The choice is entirely up to you. Your blind should now nicely fit within your window frame.
Replacing a tilting mechanism
Again you will have to remove the blind from window, and then carefully disconnect the tilt wand. Next you should see a metal or plastic seal or cap on the edge of the headrail, remove this to access the tilt mechanism. At this point you will need to slide out the tilting mechanism and replace with the new mechanism. Then you should attach the tilting wand to the new device and test to see whether it is now working. If done correctly then you should be able to reattach the cap to the edge of the headrail, securing the new mechanism in place. All that is left to do is fit the blind back into the window frame, and tilt the blind slats as usual.Replacing a tilting wand
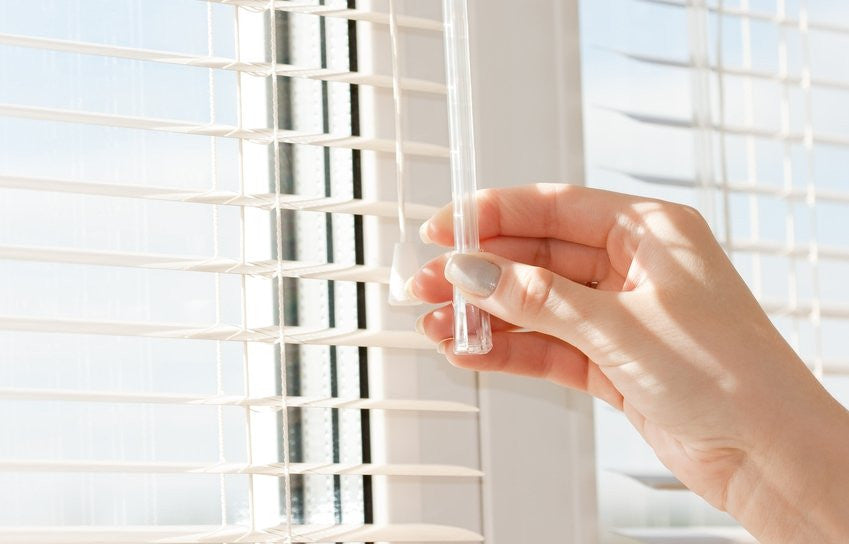
This is one of the easiest fixes for a venetian blind, as the tilting wand is just hooked to the tilting mechanism. So all you really need to do is unhook the broken tilting wand, and hook the new wand in its place. On the side of the blind where the tilting wand is located, you should see a hook just under the headrail of the blind. This is where the new wand will go. It can be fiddly to add the new wand, and you may need to lift it so that it is almost horizontal in order to place it on the hook. However, this is just a matter of aligning the hole on the tilting wand with the hook on the tilting mechanism. Once they are aligned properly the wand should slot onto the hook, and will work as required.Quick fix repair solutions for roller blinds
Roller blinds can often seem broken, but actually it might just be a simple glitch. For example, the brackets may be rubbing against the end of the roller blind. So by simply adjusting the brackets you can fix this issue quite easily. Similar glitches can also affect the performance of your blind, so before you replace it take a quick look at the solutions below:Roller blinds open too fast and then don't remain open
The tension of the blind cord and mechanism can have an impact on how well the blind opens and closes. Too much tension and the blind will roll open too fast, not enough tension and the blind will open slowly. So if your blind is opening too quickly and is not remaining open then you may need to decrease the tension of the blind mechanism.
Put the blind in the closed position and then remove from the bracket. Unroll the blind so that 45cm of blind fabric is exposed and then place back into the blind mechanism. Repeat this process multiple times until you are happy with the level of tension, and how the blind opens and closes.
Roller blinds open too slowly
Just like when the blind opened too quickly, you will need to adjust the tension on the blind mechanism. However this time you will be increasing the tension, rather than decreasing it. Lower the roller blind so all of the fabric is exposed, then take the blind out of the bracket. Then roll the blind halfway closed and return to the blind brackets. This should increase the tension, and make the blind open more quickly. If this does not work then repeat the process until you are happy with how the blind opens and closes.Roller blinds doesn't roll open evenly
Different types of fabrics are more or less elastic and stretchy, this means they can warp or "telescope" at one end. When these fabrics are on a bed you hardly notice, but when they are a part of a blind which is supposed to be perfectly square, it can be hard to ignore. To fix this issue, you will need to open the blind completely.
The issue can be resolved at the source, where the blind fabric is attached to the rolling mechanism. Once unrolled you should see the point at which the fabric stops running straight, it might just be a small deviation at the top of the blind, but this can be magnified significantly when you look at the blind in full. You can make a small amendment by adding masking tape to make the blind fabric level. A small piece of tape can add enough tension to pull the fabric up slightly on one side, which will ensure the fabric is level. Now when you close and open the blind it should be a lot more level, and open evenly.
Quick fix repair solutions for vertical blinds
With any type of blind accidents can happen, such as pet damage. In fact, with vertical blinds cats and dogs particularly enjoy playing with the blind panels, knocking them out of the way to see out of a window. So it is no wonder that on occasion you may need a little advice on how best to repair damaged vertical blinds. If this sounds like you, then keep reading:
Blinds panels are our of alignment
On occasion you may find that one panel is facing the wrong way, and doesn't flow in the same direction as the other panels on the blind. If this happens then you should initially use the blind mechanism and cord to rotate all of the blind panels. Rotating them clockwise and anti-clockwise repeatedly usually forces the misaligned panel back into alignment. Repeat this process three or four times. If this doesn't work then close the blind in one direction, and then very carefully take hold of the plastic strip at the top of the misaligned panel.

Gently rotate the panel, not applying too much pressure, but just enough to softly move it back into the right position. There should be a little resistance, as the panel will need to click back into the right position. However, if you find there is too much resistance you shouldn't force the panel into position, as you may cause further damage. In this instance, you could try to unhook the blind panel, rotate it 180 degrees and re-hook it back onto the mechanism. This should avoid the need to force the mechanism back into position, and is less likely to cause further damage. If done correctly then the panel should now be aligned with the other blind panels, and the vertical blind will look as good as new.
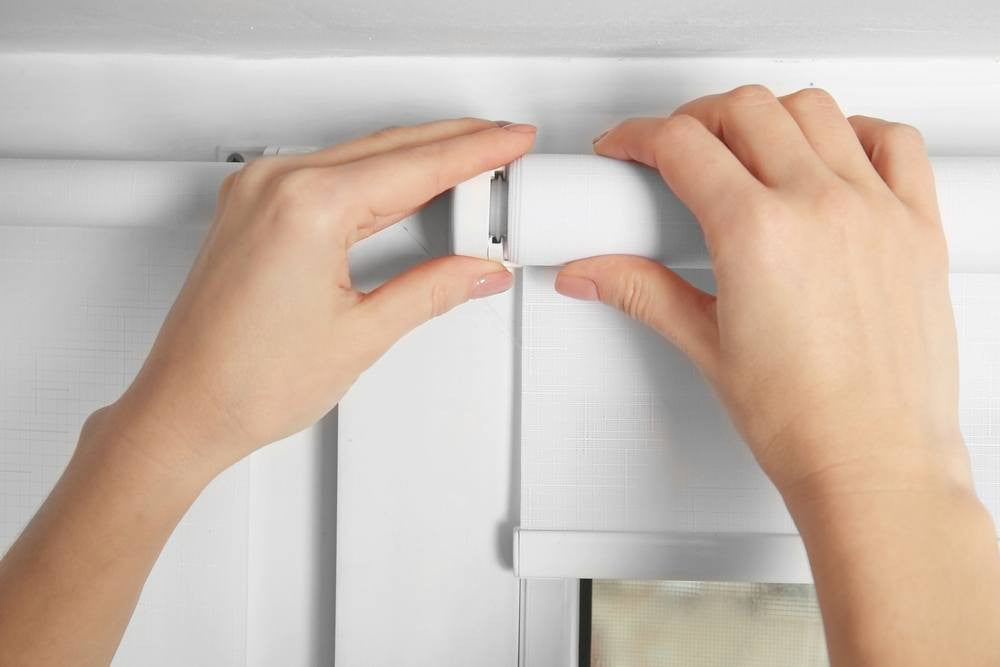
Reattaching vertical blind panels
On occasion blind panels can become detached, often this occurs when pets or children knock or pull at individual panels. Should this occur it is quite easy to reattach the panel. All you need to do is ensure that the loose panel is aligned in the same direction as adjacent panels. Then take the panel by the plastic strip at the top, looking at this strip you should see a hook that will clip onto the headrail mechanism.
You may need step ladders to reach the headrail, if so ensure they are on a flat surface and not sitting on a rug, or loose material - and follow any additional safety instructions on the side of the ladders. Once in the right position you should be able to easily reattach the blind panel back onto the headrail, using the hook on the panel and the attachment on the blind mechanism. These should clip together with relative ease. Step down from your ladder and try the adjusting control, rotating all blind panels to the open and then closed position. The blinds should all be aligned and the reattached panel should rotate as usual.
The control chain is difficult to operate
First remove the blind from the supporting brackets, and then you will need to remove the end cap from the headrail on the same side as the control chain. By looking inside you will see a pulley cord and small rod that is positioned inside the headrail. This rod sits inside the headrail going from one side to the other.
The rod should have a washer surrounding it, on occasion this can be attached too tightly and hence why the control chain is difficult to operate. To fix the control chain you will just need to loosen this washer by gently tapping the control rod to move the rod along, and provide less tension between the washer and mechanism. Place the blind headrail back into the brackets and test the control chain. It should now operate a lot more smoothly.
Tool requirements
For the most part with the fixes above you will just need replacement parts (such as blind cord, or a new tilting wand), and other than that common tools or materials. Here are our suggestions:
Masking tape - this might be needed to join an old blind cord with a new blind cord. By connecting them with masking tape you should be able to unthread the old cord and simultaneously thread the new cord at the same time.
Paperclip hook - A paperclip is a great tool for threading blind cord through small holes. Sometimes frayed ends make it almost impossible to slot cord through a small hole, but a paperclip is small enough to push the cord right through.
Pliers/Nail file - Although you may be able to remove clips and cord toggles off by hand, if you struggle then a pair of pliers or a nail file are a handy tool to use.
Pull ends - You should have the existing pull or cord end from before you made adjustments, but these can get lost or snaps. So if you're in need of one then you can buy these and they are relatively cheap. Just look in your local DIY store, usually in the lighting isle, as they are simple to cord ends for pull light switches.
Replacement cord - This can be ordered online quite easily, or it might be available from your local DIY store. Keep in mind that it is worth more than you need just in case, and that you want to match the existing cord colour as closely as possible.
Replacement slats - If you have broken blind slats then you will need to order replacement slats. If you still have the box the blind came in then you may already have replacement slats, so be sure to check for these before buying any more.
Replacement tilting wand -If your want snaps or gets lost then you will need to order a replacement. As a temporary solution you could fashion a DIY solution, but to maintain the aesthetic of the blind it is better to get a wand that matches the original.
Scissors - These will be needed to cut excess blind cord, or to cut knots in order to remove unwanted slats.


